Difference between revisions of "LC-PI-H3-ZERO"
| Line 20: | Line 20: | ||
Reverse view<br> | Reverse view<br> | ||
[[File:H3_Zero-2.jpg]]<br> | [[File:H3_Zero-2.jpg]]<br> | ||
| + | |||
| + | |||
| + | |||
| + | == '''Introduction instructions''' == | ||
| + | Board size:65*30mm/15g<br> | ||
| + | [[File:H3_Zero-3.png]]<br> | ||
| + | |||
| + | |||
| + | Resource introduction<br> | ||
| + | [[File:H3_Zero-4.jpg]]<br> | ||
| + | |||
| + | [[File:H3_Zero-5.jpg]]<br> | ||
| + | 1.Allwinner H3 ARM Cortex-A7 processor<br> | ||
| + | 2.DDR3 memory particles: 1 x 512MB<br> | ||
| + | 3.RTL8189 2.4GHz WiFi chip<br> | ||
| + | 4.Type-C USB socket: 5V power supply input, 2A or above power supply recommended<br> | ||
| + | 5.IPEX WiFi antenna interface<br> | ||
| + | 6.UART interface: When in use, GND, TX, and RX are connected to the GND, RX, and TX of the external TTL module respectively<br> | ||
| + | 7.MINI HDMI interface: supports connection to monitors/TVs with HDMI interfaces, supports HDMI audio output (you need to bring your own MINI HDMI to HDMI adapter/cable)<br> | ||
| + | 8.PWR power key: Short press to pause the screen and press again to turn on the screen/long press for more than 2 seconds to shut down (requires mouse click to confirm shutdown)<br> | ||
| + | 9.RST reset key: short press to restart the system<br> | ||
| + | 10.PWR power light: red, programmable<br> | ||
| + | 11.STA status light: green, programmable<br> | ||
| + | 12.Micro USB OTG interface: can be used for OTG debugging/connecting keyboard, mouse, USB disk and other peripherals (when used to connect peripherals, it is recommended to plug in the USB peripherals before powering on the board)<br> | ||
| + | 13.Type-C USB 2.0 Host interface: can be used to connect peripherals such as keyboard, mouse, USB flash drive, etc.<br> | ||
| + | 14.2.54mm 2*20Pin GPIO pin header, compatible with Raspberry Pi<br> | ||
| + | 15.TF card holder: supports up to 64G TF card<br> | ||
| + | |||
| + | |||
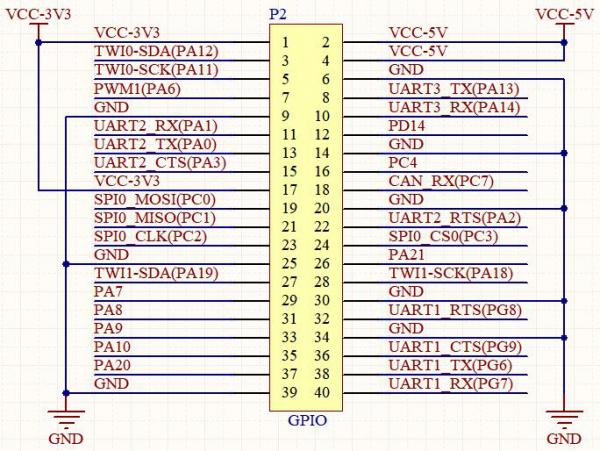
| + | '''GPIO pin introduction'''<br> | ||
| + | [[File:H3_Zero-6.png]]<br> | ||
| + | |||
| + | |||
| + | |||
| + | == '''Function features''' == | ||
| + | *CPU: Allwinner H3 Quad-core ARM Cortex-A7 MPCore quad-core processor<br> | ||
| + | *GPU: ARM Mali400MP2 GPU,support OpenGL ES2.0 and OpenVG 1.1 standard<br> | ||
| + | *Memory: 512MB DDR3 (shared with GPU)<br> | ||
| + | *Memory card: used to load the operating system, supports up to 64GB TF card<br> | ||
| + | *Wireless network: onboard RTL8189 2.4GHz WiFi transmission IC and IPEX antenna interface<br> | ||
| + | *Audio and video output: HDMI (MINI version connector), supports connection to monitors/TVs with HDMI ports<br> | ||
| + | *USB interface: 1 x Micro USB OTG + 1 x Type-C USB 2.0 Host interface<br> | ||
| + | *GPIO: onboard 2.54mm 2*20Pin GPIO pin header, compatible with Raspberry Pi<br> | ||
| + | *UART: onboard 2.54mm 1*3Pin UART pin header<br> | ||
| + | *Key: Onboard power and reset key<br> | ||
| + | *Power supply: Type-C USB 5V power input<br> | ||
| + | *LED lights: Onboard Power (red) and Status (green) indicators<br> | ||
| + | *System: Support Android4.4, Ubuntu, Debian and other operating systems<br> | ||
| + | |||
| + | |||
| + | |||
| + | == '''Use description''' == | ||
| + | '''1.Prepare needed accessories'''<br> | ||
| + | (1)SD card, used to burn system SD<br> | ||
| + | [[File:H3_Zero-7.png]]<br> | ||
| + | |||
| + | (2)SDK card reader, used to read and write SD cards<br> | ||
| + | [[File:H3_Zero-8.png]]<br> | ||
| + | |||
| + | (3)USB to TTL serial port module for UART interface testing<br> | ||
| + | [[File:H3_Zero-9.png]]<br> | ||
| + | |||
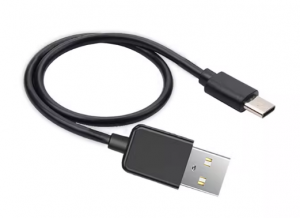
| + | (4)Type-C cable, 5V power supply input, 2A or above power supply recommended<br> | ||
| + | [[File:H3_Zero-10.png]]<br> | ||
| + | |||
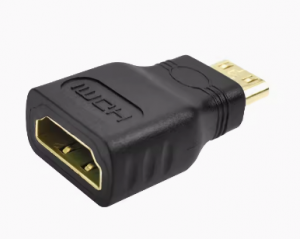
| + | (5)HDMI adapter, used to convert MiniHDMI to standard HDMI<br> | ||
| + | [[File:H3_Zero-11.png]]<br> | ||
| + | |||
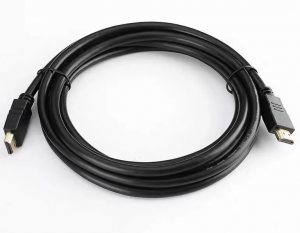
| + | (6)HDMI cable, used for HDMI testing, HDMI interface connected to the monitor<br> | ||
| + | [[File:H3_Zero-12.png]]<br> | ||
| + | |||
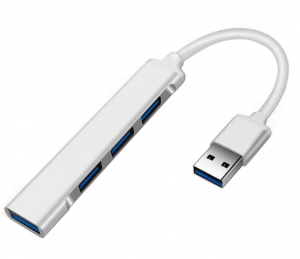
| + | (7)USB HUB, used for USB OTG/Host interface testing to connect keyboard, mouse and other devices<br> | ||
| + | [[File:H3_Zero-13.png]]<br> | ||
| + | |||
| + | |||
| + | '''2.System burning'''<br> | ||
| + | The development board starts the system from the SD card. The following is the method of burning the system to the SD card:<br> | ||
| + | (1)Burn Android system to SD card<br> | ||
| + | Insert the SD card into the computer, open the PhonixCard software, click "Firmware" to load the Image system file, select "Start Card", click "Burn Card", after the burning is completed, insert the card into the SD card slot, and the development board is powered on again. Can.<br> | ||
| + | [[File:H3_Zero-14.png]]<br> | ||
| + | |||
| + | (2)Burn Ubuntu/Debian system to SD card<br> | ||
| + | Insert the SD card into the computer, open the Win32DiskImager software, open the Image system file, click "Write", after the programming is completed, insert the card into the SD card slot, and power on the development board again.<br> | ||
| + | [[File:H3_Zero-15.png]]<br> | ||
| + | Tip: If you want to re-burn the system on a card that has already been programmed with the system, you must first format it with software such as SDFormatter (because the formatting tool that comes with Windows cannot recognize the Linux file system), as follows:<br> | ||
| + | [[File:H3_Zero-16.png]]<br> | ||
| + | |||
| + | |||
| + | |||
| + | == '''Basic testing''' == | ||
| + | 1.WiFi testing<br> | ||
| + | Turn on the device (taking the Android system as an example), enable the WIFI function in the settings, enter the WIFI password to be connected through the mouse/keyboard, and it will be enough to connect to the router, as follows:<br> | ||
| + | [[File:H3_Zero-17.png]]<br> | ||
| + | |||
| + | 2.USB OTG/Host interface testing<br> | ||
| + | Connect a USB HUB to the Micro/Type-C USB port (you need to prepare your own USB hub for Micro/Type-C to Type-A port). Connect the mouse, keyboard and other devices to the hub and the device can be correctly identified.<br> | ||
| + | |||
| + | 3.UART interface testing<br> | ||
| + | The UART debugging interface can check the running status of the board, such as checking the serial port output when booting. The method is as follows:<br> | ||
| + | ●Prepare a USB to TTL serial port module (for example: CH340, CP2102, etc.). The GND, TX, and RX of the serial port module are connected to the GND, RX, and TX of the development board respectively.<br> | ||
| + | |||
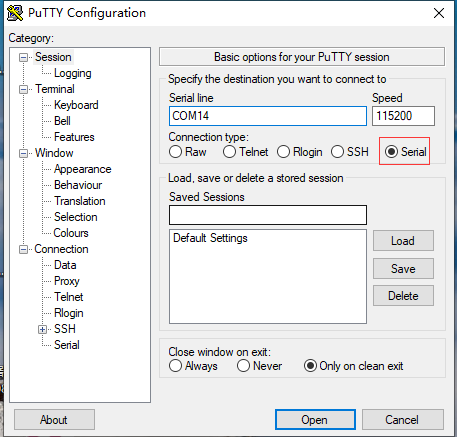
| + | ●Open the putty debugging software, select the correct port number and baud rate, and click "Open"<br> | ||
| + | [[File:H3_Zero-18.png]]<br> | ||
| + | |||
| + | [[File:H3_Zero-19.png]]<br> | ||
| + | |||
| + | ●Power on the development board. If debugging information can be output, the UART interface is OK.<br> | ||
| + | [[File:H3_Zero-20.png]]<br> | ||
| + | |||
| + | 4.HDMI testing<br> | ||
| + | If the HDMI interface is connected to the monitor, it can display the image normally. If it is a monitor with speakers, there will also be sound output (you need to bring your own MINI HDMI to HDMI adapter/adapter cable)<br> | ||
| + | |||
| + | 5.Button testing<br> | ||
| + | PWR power button: Press once to pause the screen, then re-click the screen/long press for more than 2 seconds to shut down (requires mouse click to confirm shutdown)<br> | ||
| + | RST reset button: can restart the device<br> | ||
| + | |||
| + | |||
| + | |||
| + | == '''Source code compilation''' == | ||
| + | '''1.VM installation'''<br> | ||
| + | LC provides customers with virtual machines that have built various compilation environments. You can directly install the virtual machine for compilation. The steps are as follows:<br> | ||
| + | (1)Download and unzip the Ubuntu_16.04_X64_H3_ANDROID.7z virtual machine file<br> | ||
| + | |||
| + | (2)Open the VMware Workstation software, click "Open Virtual Machine", and locate the Ubuntu_16.04_X64.vmx file in the file Ubuntu_16.04_X64_H3_ANDROID you just decompressed<br> | ||
| + | [[File:H3_Zero-21.png]]<br> | ||
| + | |||
| + | (3)Click the green play icon on the left or in the menu bar to "Start this virtual machine"<br> | ||
| + | [[File:H3_Zero-22.png]]<br> | ||
| + | |||
| + | (4)After entering the Ubuntu system, click on the Test account and enter the password 123456 to enter the system<br> | ||
| + | [[File:H3_Zero-23.png]]<br> | ||
| + | |||
| + | |||
| + | '''2.Source code compilation'''<br> | ||
| + | (1)Click [[File:H3_Zero-24.png]] icon,Press the Home/LC/CherryPi-H3 path to enter, there are two folders below<br> | ||
| + | [[File:H3_Zero-25.png]]<br> | ||
| + | |||
| + | [[File:H3_Zero-26.png]]<br> | ||
| + | |||
| + | (2)Enter the lichee directory, right-click the mouse and open the Terminal tool<br> | ||
| + | ●Enter ./build.sh config,Enter<br> | ||
| + | ●Enter 1,Enter<br> | ||
| + | ●Enter 0,Enter<br> | ||
| + | ●Enter 0,Enter<br> | ||
| + | [[File:H3_Zero-27.png]]<br> | ||
| + | |||
| + | Wait for a while (depending on computer configuration) to complete this step<br> | ||
| + | |||
| + | [[File:H3_Zero-28.png]]<br> | ||
| + | |||
| + | (3)Enter the android directory, right-click the mouse and open the Terminal tool<br> | ||
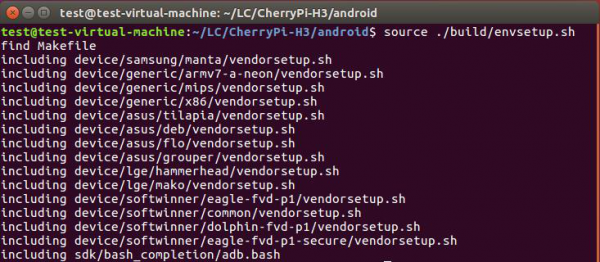
| + | ●Enter source ./build/envsetup.sh,Enter<br> | ||
| + | [[File:H3_Zero-29.png]]<br> | ||
| + | |||
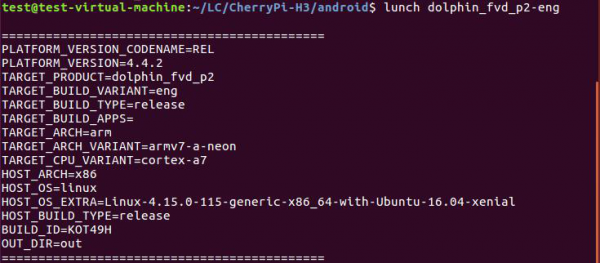
| + | ●Enter lunch dolphin_fvd_p2-eng,Enter<br> | ||
| + | [[File:H3_Zero-30.png]]<br> | ||
| + | |||
| + | ●Enter extract-bsp,Enter<br> | ||
| + | [[File:H3_Zero-31.png]]<br> | ||
| + | |||
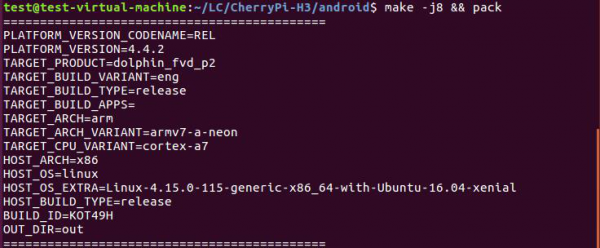
| + | ●Enter make -j8 && pack,Enter<br> | ||
| + | [[File:H3_Zero-32.png]]<br> | ||
| + | |||
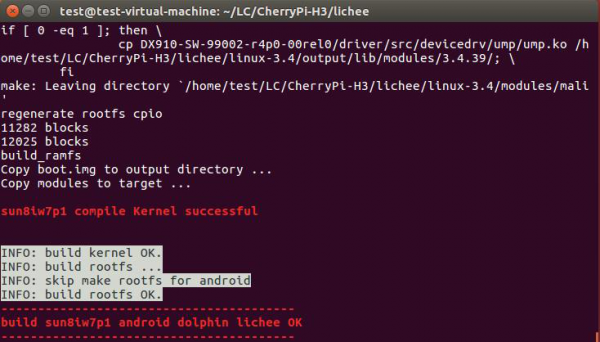
| + | After waiting for a period of time (depending on the computer configuration), complete this step<br> | ||
| + | [[File:H3_Zero-33.png]]<br> | ||
| + | |||
| + | The image file output path is:<br> | ||
| + | Home/LC/CherryPi-H3/lichee/tools/pack/sun8iw7p1_android_dolphin-p2_uart0.img<br> | ||
| + | |||
| + | |||
| + | |||
| + | == '''Download LC-PI-H3-ZERO User Manual''' == | ||
| + | For more information about the use of LC-PI-H3-ZERO, please view the Baidu network disk extraction code: sbod<br> | ||
Revision as of 15:59, 24 January 2024
Contents
Product name
LCPI Allwinner H3 Zero development board Android/Ubuntu/Linux open source programming quad-core ARM learning board.
About LC-PI-H3-ZERO
LC LCPI H3 ZERO development board is equipped with Allwinner H3 processor, H3 is a complete 4K smart TV set-top box solution from Allwinner Technology, Based on quad-core Cortex-A7 CPU architecture, Support H.265/HEVC 4K@30fps video hard decoding, using ARM Mali series graphics processing architecture, Operating frequency exceeds 600MHz, built-in t-Coffer based on ARM TrustZone security technology. Integrated Allwinner Technology's latest SmartColor display engine.
Application fields of LC-PI-H3-ZERO
The development board integrates WiFi, HDMI, 1 x USB OTG, 1 x USB Host, UART Debug interface and 2*20Pin GPIO outlet (compatible with Raspberry Pi IO), and the size is compatible with Raspberry Pi Zero. It is not only a microcomputer that can realize audio and video entertainment, but also can be used for Linux/Android programming learning and project development,Supports Android4.4, Ubuntu, Debian and other operating systems.
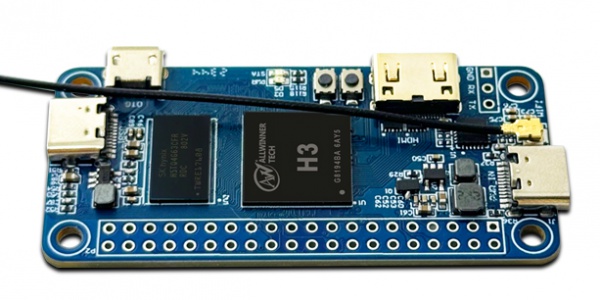
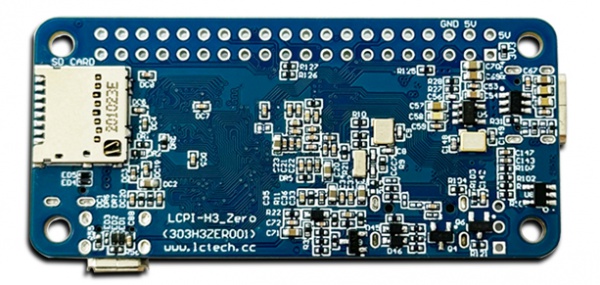
LC-PI-H3-ZERO view
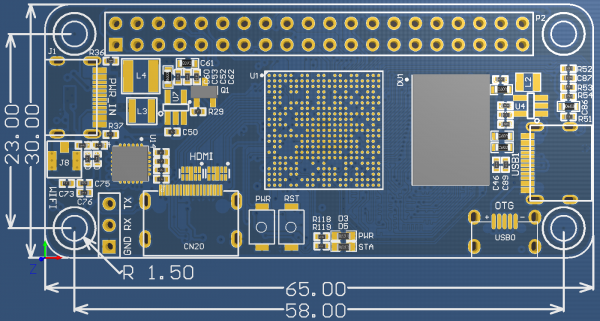
Introduction instructions
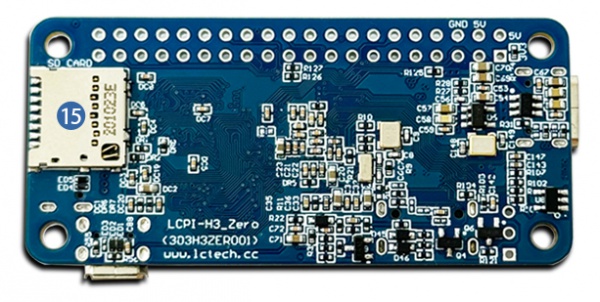
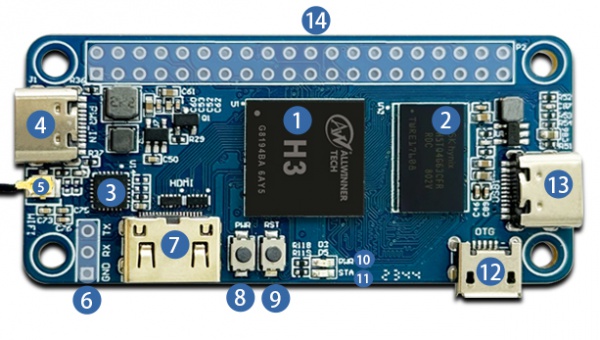
1.Allwinner H3 ARM Cortex-A7 processor
2.DDR3 memory particles: 1 x 512MB
3.RTL8189 2.4GHz WiFi chip
4.Type-C USB socket: 5V power supply input, 2A or above power supply recommended
5.IPEX WiFi antenna interface
6.UART interface: When in use, GND, TX, and RX are connected to the GND, RX, and TX of the external TTL module respectively
7.MINI HDMI interface: supports connection to monitors/TVs with HDMI interfaces, supports HDMI audio output (you need to bring your own MINI HDMI to HDMI adapter/cable)
8.PWR power key: Short press to pause the screen and press again to turn on the screen/long press for more than 2 seconds to shut down (requires mouse click to confirm shutdown)
9.RST reset key: short press to restart the system
10.PWR power light: red, programmable
11.STA status light: green, programmable
12.Micro USB OTG interface: can be used for OTG debugging/connecting keyboard, mouse, USB disk and other peripherals (when used to connect peripherals, it is recommended to plug in the USB peripherals before powering on the board)
13.Type-C USB 2.0 Host interface: can be used to connect peripherals such as keyboard, mouse, USB flash drive, etc.
14.2.54mm 2*20Pin GPIO pin header, compatible with Raspberry Pi
15.TF card holder: supports up to 64G TF card
Function features
- CPU: Allwinner H3 Quad-core ARM Cortex-A7 MPCore quad-core processor
- GPU: ARM Mali400MP2 GPU,support OpenGL ES2.0 and OpenVG 1.1 standard
- Memory: 512MB DDR3 (shared with GPU)
- Memory card: used to load the operating system, supports up to 64GB TF card
- Wireless network: onboard RTL8189 2.4GHz WiFi transmission IC and IPEX antenna interface
- Audio and video output: HDMI (MINI version connector), supports connection to monitors/TVs with HDMI ports
- USB interface: 1 x Micro USB OTG + 1 x Type-C USB 2.0 Host interface
- GPIO: onboard 2.54mm 2*20Pin GPIO pin header, compatible with Raspberry Pi
- UART: onboard 2.54mm 1*3Pin UART pin header
- Key: Onboard power and reset key
- Power supply: Type-C USB 5V power input
- LED lights: Onboard Power (red) and Status (green) indicators
- System: Support Android4.4, Ubuntu, Debian and other operating systems
Use description
1.Prepare needed accessories
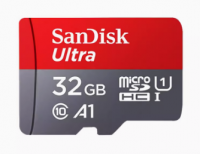
(1)SD card, used to burn system SD
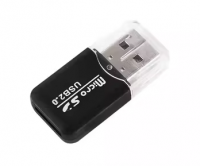
(2)SDK card reader, used to read and write SD cards
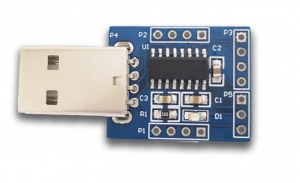
(3)USB to TTL serial port module for UART interface testing
(4)Type-C cable, 5V power supply input, 2A or above power supply recommended
(5)HDMI adapter, used to convert MiniHDMI to standard HDMI
(6)HDMI cable, used for HDMI testing, HDMI interface connected to the monitor
(7)USB HUB, used for USB OTG/Host interface testing to connect keyboard, mouse and other devices
2.System burning
The development board starts the system from the SD card. The following is the method of burning the system to the SD card:
(1)Burn Android system to SD card
Insert the SD card into the computer, open the PhonixCard software, click "Firmware" to load the Image system file, select "Start Card", click "Burn Card", after the burning is completed, insert the card into the SD card slot, and the development board is powered on again. Can.
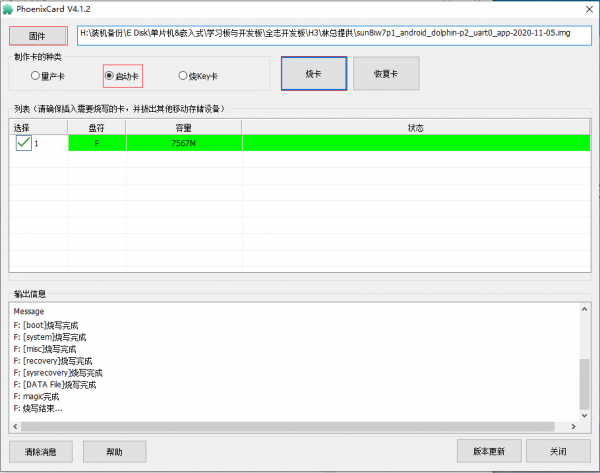
(2)Burn Ubuntu/Debian system to SD card
Insert the SD card into the computer, open the Win32DiskImager software, open the Image system file, click "Write", after the programming is completed, insert the card into the SD card slot, and power on the development board again.
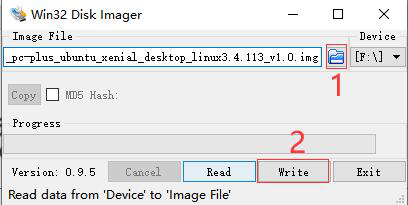
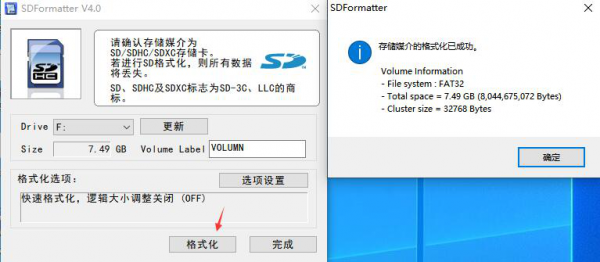
Tip: If you want to re-burn the system on a card that has already been programmed with the system, you must first format it with software such as SDFormatter (because the formatting tool that comes with Windows cannot recognize the Linux file system), as follows:
Basic testing
1.WiFi testing
Turn on the device (taking the Android system as an example), enable the WIFI function in the settings, enter the WIFI password to be connected through the mouse/keyboard, and it will be enough to connect to the router, as follows:
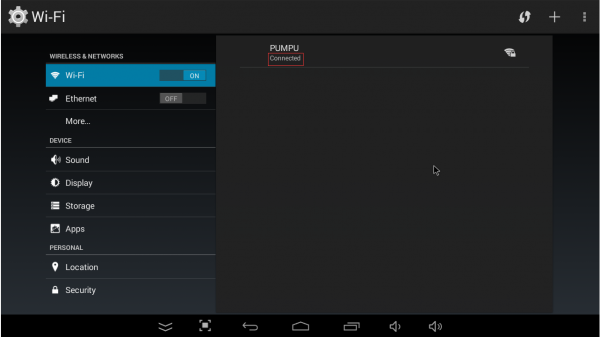
2.USB OTG/Host interface testing
Connect a USB HUB to the Micro/Type-C USB port (you need to prepare your own USB hub for Micro/Type-C to Type-A port). Connect the mouse, keyboard and other devices to the hub and the device can be correctly identified.
3.UART interface testing
The UART debugging interface can check the running status of the board, such as checking the serial port output when booting. The method is as follows:
●Prepare a USB to TTL serial port module (for example: CH340, CP2102, etc.). The GND, TX, and RX of the serial port module are connected to the GND, RX, and TX of the development board respectively.
●Open the putty debugging software, select the correct port number and baud rate, and click "Open"

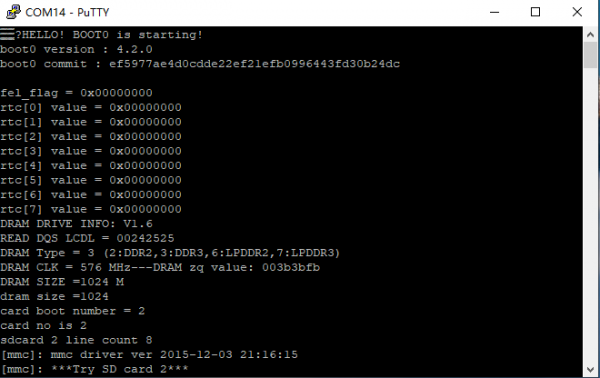
●Power on the development board. If debugging information can be output, the UART interface is OK.
4.HDMI testing
If the HDMI interface is connected to the monitor, it can display the image normally. If it is a monitor with speakers, there will also be sound output (you need to bring your own MINI HDMI to HDMI adapter/adapter cable)
5.Button testing
PWR power button: Press once to pause the screen, then re-click the screen/long press for more than 2 seconds to shut down (requires mouse click to confirm shutdown)
RST reset button: can restart the device
Source code compilation
1.VM installation
LC provides customers with virtual machines that have built various compilation environments. You can directly install the virtual machine for compilation. The steps are as follows:
(1)Download and unzip the Ubuntu_16.04_X64_H3_ANDROID.7z virtual machine file
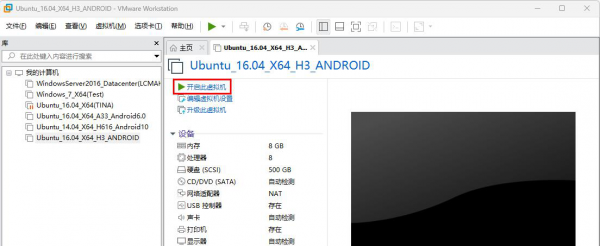
(2)Open the VMware Workstation software, click "Open Virtual Machine", and locate the Ubuntu_16.04_X64.vmx file in the file Ubuntu_16.04_X64_H3_ANDROID you just decompressed

(3)Click the green play icon on the left or in the menu bar to "Start this virtual machine"
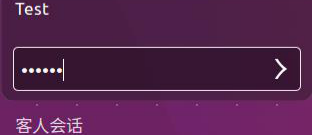
(4)After entering the Ubuntu system, click on the Test account and enter the password 123456 to enter the system
2.Source code compilation
(1)Click  icon,Press the Home/LC/CherryPi-H3 path to enter, there are two folders below

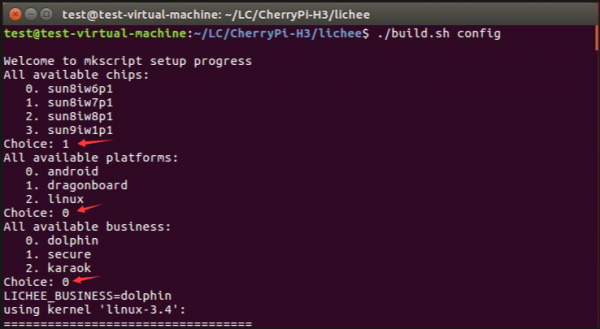
(2)Enter the lichee directory, right-click the mouse and open the Terminal tool
●Enter ./build.sh config,Enter
●Enter 1,Enter
●Enter 0,Enter
●Enter 0,Enter
Wait for a while (depending on computer configuration) to complete this step
(3)Enter the android directory, right-click the mouse and open the Terminal tool
●Enter source ./build/envsetup.sh,Enter
●Enter lunch dolphin_fvd_p2-eng,Enter
After waiting for a period of time (depending on the computer configuration), complete this step
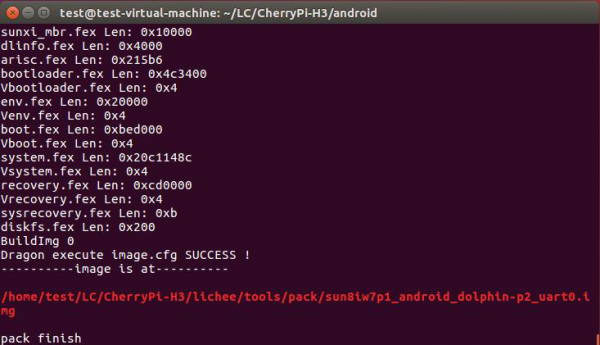
The image file output path is:
Home/LC/CherryPi-H3/lichee/tools/pack/sun8iw7p1_android_dolphin-p2_uart0.img
Download LC-PI-H3-ZERO User Manual
For more information about the use of LC-PI-H3-ZERO, please view the Baidu network disk extraction code: sbod
