Difference between revisions of "LC-BT-1-8"
(Created page with "== '''Product name''' == 5V/7-28V supply power 8-channel bluetooth relay IoT smart home mobile APP remote control switch<br> == '''About LC-BT-1-8''' == LC 5V/7-28V 8-chann...") |
(→Introduction instruction) |
||
| Line 19: | Line 19: | ||
== '''Introduction instruction''' == | == '''Introduction instruction''' == | ||
| − | [[File:BT-1-8-3.jpg]]<br> | + | [[File:BT-1-8-3-1.jpg]]<br> |
Board size:148*79.8mm/140g<br> | Board size:148*79.8mm/140g<br> | ||
| Line 74: | Line 74: | ||
Open the eighth relay: A0 08 01 A9<br> | Open the eighth relay: A0 08 01 A9<br> | ||
Close the eighth relay: A0 08 00 A8<br> | Close the eighth relay: A0 08 00 A8<br> | ||
| − | |||
| − | |||
== '''Function features''' == | == '''Function features''' == | ||
Latest revision as of 15:51, 22 February 2024
Contents
Product name
5V/7-28V supply power 8-channel bluetooth relay IoT smart home mobile APP remote control switch
About LC-BT-1-8
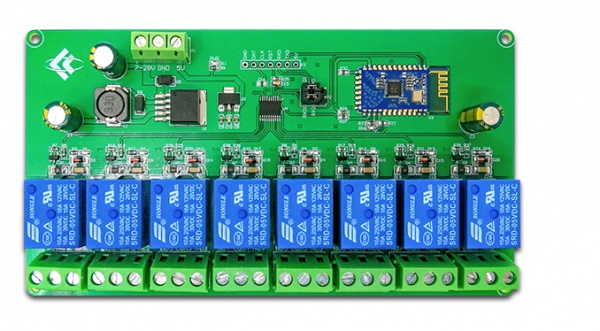
LC 5V/7-28V 8-channel Bluetooth relay module includes 8-channel 5V/10A relay module and SPP-C Bluetooth serial port slave module,Commands can be sent through the mobile APP to control the switch of the relay.
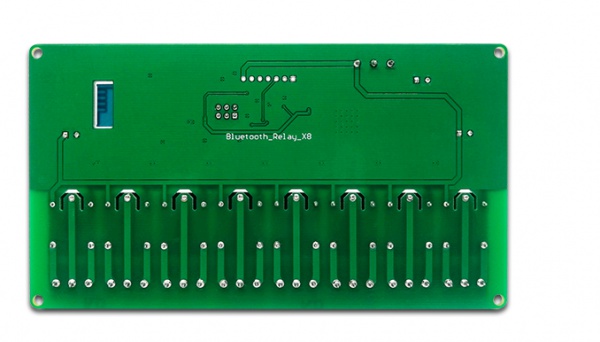
LC-BT-1-8 view
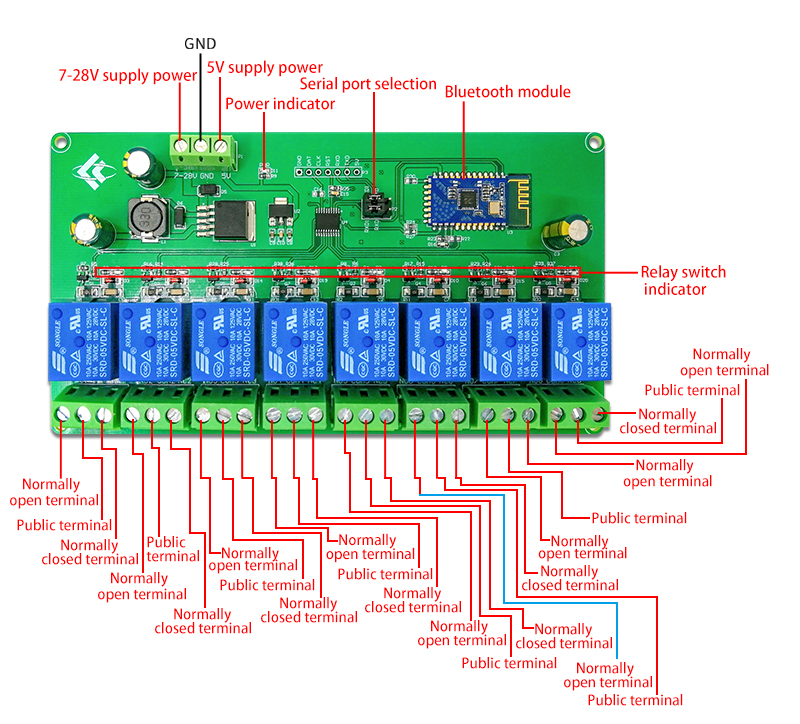
Introduction instruction
1.7-28V、GND、5V:7-28V/5V power input
2.TX, RX: UART serial port pins
3.5V, GND, SWIM, NRST: MCU program download port
4.LED D1/D7/D12/D17/D2/D8/D13/D18(red light): relay working indicator light, lights up when turned on
5.LED D16 (blue light): Bluetooth status indicator light, described as follows
(1) When it flashes slowly, it means waiting to establish a connection with the mobile phone.
(2) When it stays on, it means the connection is successfully established with the mobile phone.
6.The two reserved jumper caps: please insert them to the right end during normal use (i.e. RX is connected to RX1, TX is connected to TX1)
If you want to use the USB to TTL serial port module alone to debug the SPP-C module, please insert both to the left (otherwise there may be interference)
7.
COM1:Public terminal
NC1: Normally closed terminal, short-circuited with COM1 before the relay is closed, and left floating after closing.
NO1: Normally open, the relay is left floating before closing, and short-circuited with COM1 after closing.
COM2:Public terminal
NC2: Normally closed terminal, short-circuited with COM2 before the relay is closed, and left floating after closing.
NO2: Normally open, the relay is left floating before closing, and short-circuited with COM2 after closing.
COM3:Public terminal
NC3: Normally closed terminal, short-circuited with COM3 before the relay is closed, and left floating after closing.
NO3: Normally open, the relay is left floating before closing, and short-circuited with COM3 after closing.
COM4:Public terminal
NC4: Normally closed terminal, short-circuited with COM4 before the relay is closed, and left floating after closing.
NO4: Normally open, the relay is left floating before closing, and short-circuited with COM4 after closing.
COM5:Public terminal
NC5: Normally closed terminal, short-circuited with COM5 before the relay is closed, and left floating after closing.
NO5: Normally open, the relay is left floating before closing, and short-circuited with COM5 after closing.
COM6:Public terminal
NC6: Normally closed terminal, short-circuited with COM6 before the relay is closed, and left floating after closing.
NO6: Normally open, the relay is left floating before closing, and short-circuited with COM6 after closing.
COM7:Public terminal
NC7: Normally closed terminal, short-circuited with COM7 before the relay is closed, and left floating after closing.
NO7: Normally open, the relay is left floating before closing, and short-circuited with COM7 after closing.
COM8:Public terminal
NC8: Normally closed terminal, short-circuited with COM8 before the relay is closed, and left floating after closing.
NO8: Normally open, the relay is left floating before closing, and short-circuited with COM8 after closing.
8. Relay control instructions (hexadecimal hex format)
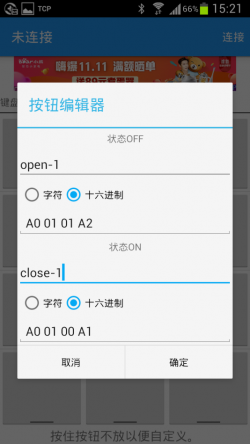
Open the first relay: A0 01 01 A2
Close the first relay: A0 01 00 A1
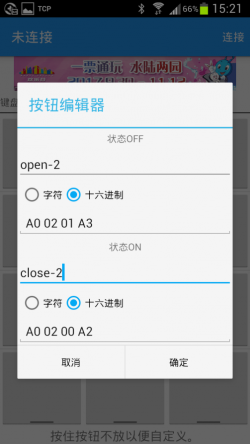
Open the second relay: A0 02 01 A3
Close the second relay: A0 02 00 A2
Open the third relay: A0 03 01 A4
Close the third relay: A0 03 00 A3
Open the fourth relay: A0 04 01 A5
Close the fourth relay: A0 04 00 A4
Open the fifth relay: A0 05 01 A6
Close the fifth relay: A0 05 00 A5
Open the sixth relay: A0 06 01 A7
Close the sixth relay: A0 06 00 A6
Open the seventh relay: A0 07 01 A8
Close the seventh relay: A0 07 00 A7
Open the eighth relay: A0 08 01 A9
Close the eighth relay: A0 08 00 A8
Function features
- Onboard 8-Bit high-performance microcontroller chip and SPP-C Bluetooth 2.1 slave module
- Provide Bluetooth relay control APP
- Control distance: 10M (open environment)
- Working voltage: DC7-28V/5V
- Onboard 8-channe l5V 10A/250V AC 10A/30V DC relay, which can be connected continuously for 100,000 times, has diode overflow protection and short response time
- With 4 optocoupler isolation, strong anti-interference ability
- Onboard Bluetooth status indicator and relay indicator
- Reserved UART debugging interface and MCU program download port
Use description
1.Tool software
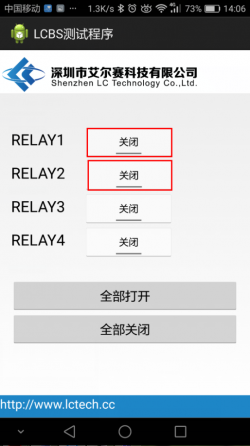
①"LCBS Test Program" APP, a Bluetooth relay-specific APP developed by LC Electronics, used to send relay control instructions
② "BlueSPP_37" APP, a general APP downloaded from the Android App Store, used to send relay control instructions
③"SSCOM32" serial port debugging software, used to send instructions to control relays and modify names and passwords

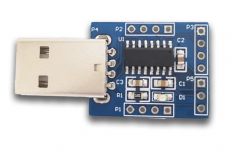
④USB to TTL module and Dupont cable, used to implement additional functions and modify Bluetooth name and password
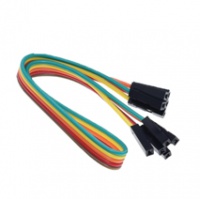
⑤Dupont wire, used to connect modules
2.Use description
Connect the power supply: Connect the 7-28V and GND of the module to the 7-28V power supply, or connect the 5V and GND to the 5V power supply. The power supply current must be more than 1A to open all relays.
(1) Bluetooth relay dedicated APP "LCBS test program"
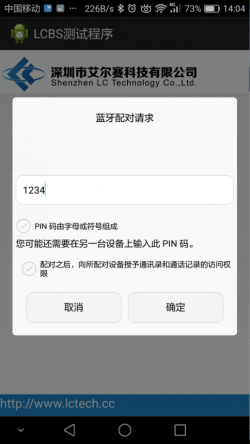
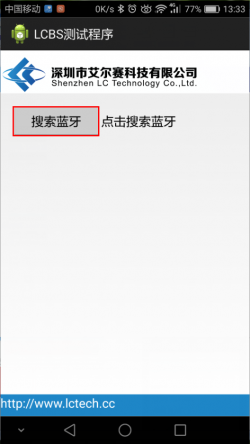
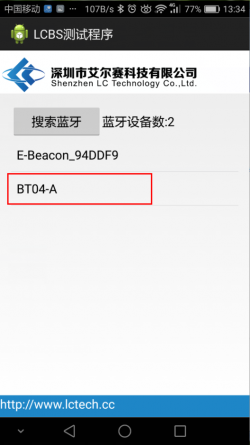
Install the "LCBS Test Program" APP on the Android phone, a Bluetooth serial port transmission tool, open the APP, click "Search Bluetooth", connect the phone to the Bluetooth module, enter the password and click Confirm
After the connection is successful, the blue light will change from slow flashing to steady light, and then click the square to control the relay switch.
(2) Bluetooth relay universal APP "BlueSPP_37"(Take dual-channel as an example)
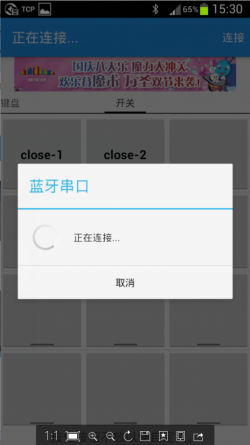
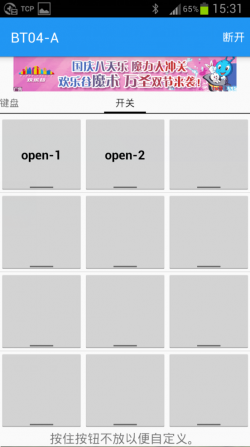
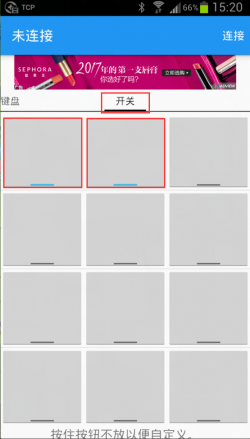
①Install the APP "BlueSPP_37" on the Android mobile phone, a Bluetooth serial port transmission tool, used to send relay control instructions, click "Switch"
Then long press the gray square in the interface to enter the name and content of the dual-channel relay control instructions (the instruction format is HEX format)
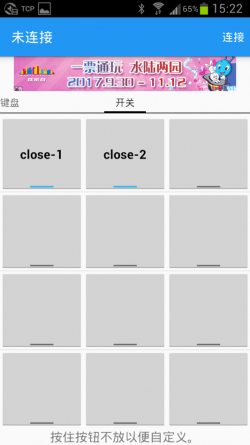
②Open the "BlueSPP_37" APP, click "Connect", and connect the mobile phone to the Bluetooth module. After the connection is successful, the blue light will change from slow flashing to solid light. Click the gray square to send instructions to control the switch of the relay.
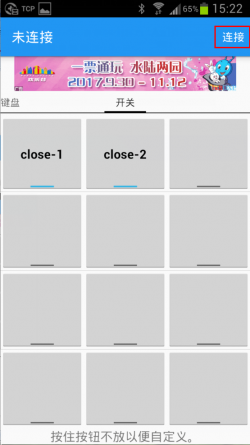
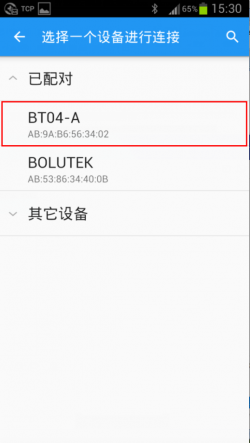
(3) Additional function (as USB relay)
Prepare a USB to TTL serial port module. The GND, TX and RX of the TTL module are connected to the GND, TX and RX of the relay module respectively.
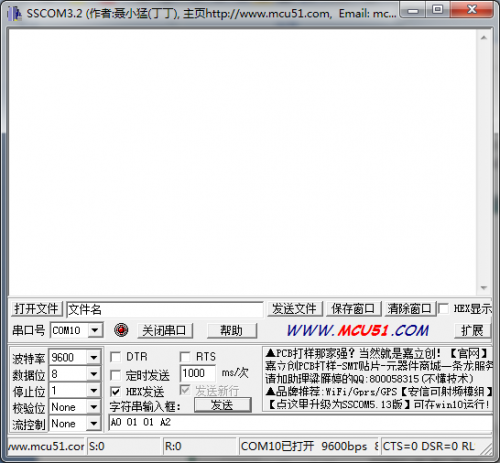
Open the serial port debugging software (such as SSCOM32) on the computer and select the baud rate of 9600
Send A0 01 01 A2 in hexadecimal (hex) form and open the first relay
Send A0 01 00 A1 in hexadecimal (hex) form to close the first and second relays
Take turning on a relay as an example
The operation methods of the other 7 channels are the same. For specific instructions, please see the introduction of "Relay Control Instructions" in the document.
(4) How to modify Bluetooth name and password
Wiring method: 5V, RX, TX, GND on the Bluetooth relay module are connected to 5V, TX, RX, GND of the USB to TTL serial port module respectively, and the Bluetooth related parameters are modified by sending AT commands.
(If there is no response when sending serial port commands, you can try exchanging TX and RX)
①Change password: If you want to change the password to 8888, open the serial port debugging assistant software on the computer, enter AT+PIN8888, and click Send.
(Such as SSCOM32, select baud rate 9600, check "Send New Line")
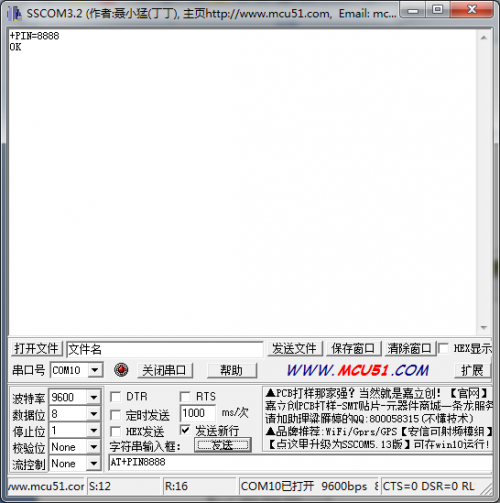
② Modify the Bluetooth name: If you send AT+NAMEBOLUTEK, you can change the name to BOLUTEK, and then send AT+RESET to make the newly modified name take effect.
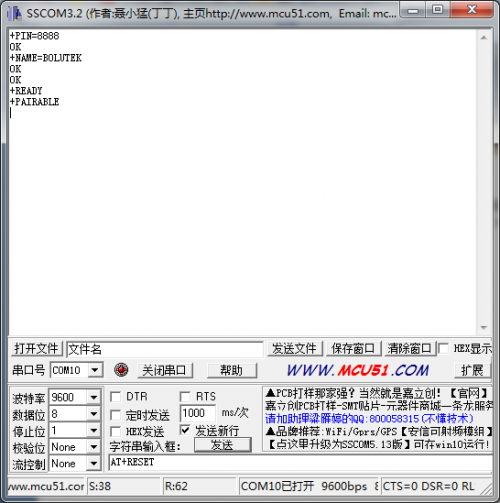
For more AT commands, you can view the SPP-C data sheet in the information.
Download the LC-BT-1-8 user manual
For more information about the use of LC-BT-1-8, please view the Baidu network disk extraction code: q26s
