LC-PI-H6
Product name
LCPI PC H6 V3 computer development board Allwinner H6 chip open source programming MCU/with EMMC.
Introduction
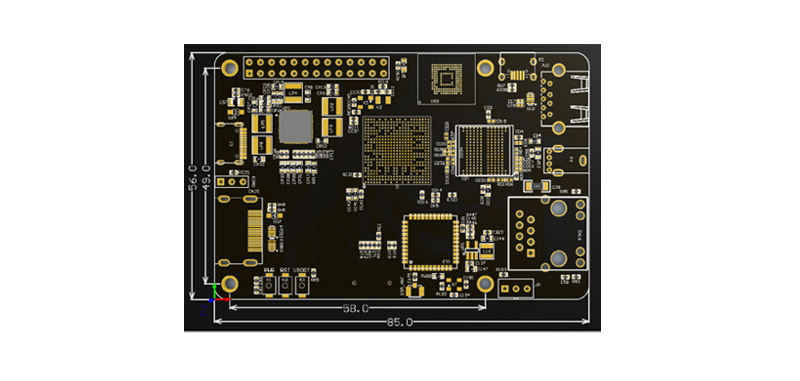
1.Board size:85*56mm Weight:35g
Overview
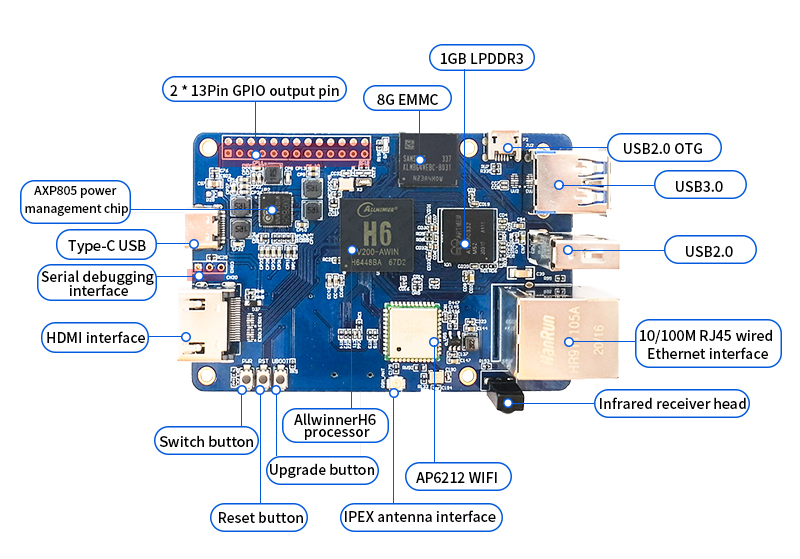
LCPI PC H6 V3 uses Allwinner H6 Cortex-53 quad-core processor, supports Android7.0, Ubuntu and Debian and other operating systems, with a main frequency of 1.5 GHz and ultra-low power consumption. Adopt Mali-720 MP2 GPU, support 1080P video encoding, H.264 hard decoding.
Function
- CPU:Allwinner H6 Quad Core 1.8GHz 64-bit ARM Cortex-A53
- GPU:Mali-720 MP2 GPU
- Memory:1GB LPDDR3 (shared with GPU)
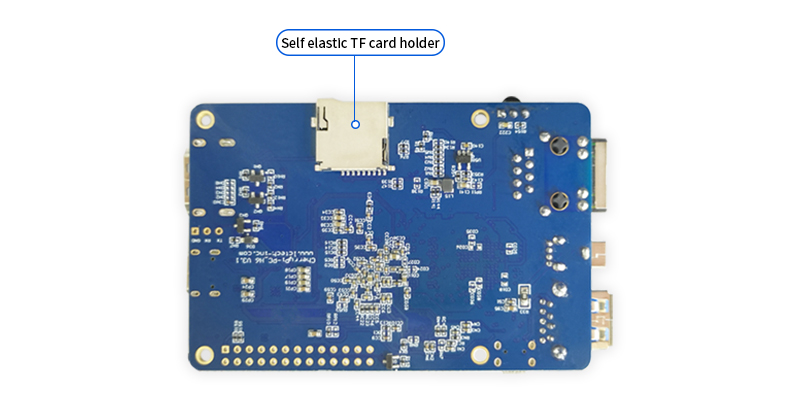
- Support memory card:onboard self-popping TF card holder,maximum support 64GB TF card
- Onboard EMMC:8G EMMC memory chip,faster and more stable than TF card
- Ethernet:10/100M RJ45 Ethernet interface
- WiFi:onboard AP6212 2.4GHz WiFi transmission chip and IPEX antenna interface
- Video output:HDMI,support connection with LCD monitor/TV with HDMI
- Audio output:HDMI
- USB2.0:1 USB 2.0 Host interface,1 USB OTG 2.0
- USB3.0:1 USB 3.0 interface
- Infrared:Onboard infrared receiver,the development board can be controlled by remote control
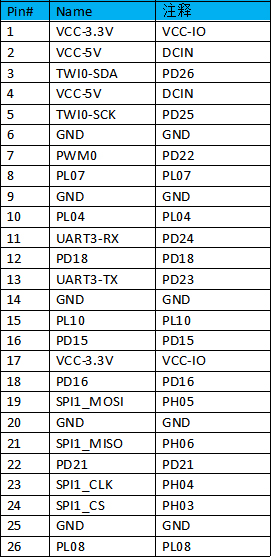
- GPIO:On-board 2.54mm 2*13Pin GPIO pin header
- UART:On-board 2.54mm 1X3Pin UART (GND, TX, RX) pin header
- Buttons:On-board power button,reset button and upgrade button
- LED light:On-board status indicator
- Power supply:5V Type-C USB power input,MicroUSB (USB)
- Supported systems:Android7.0,Ubuntu,Debian and other operating systems
System burning
1. Burn Android system to SD card
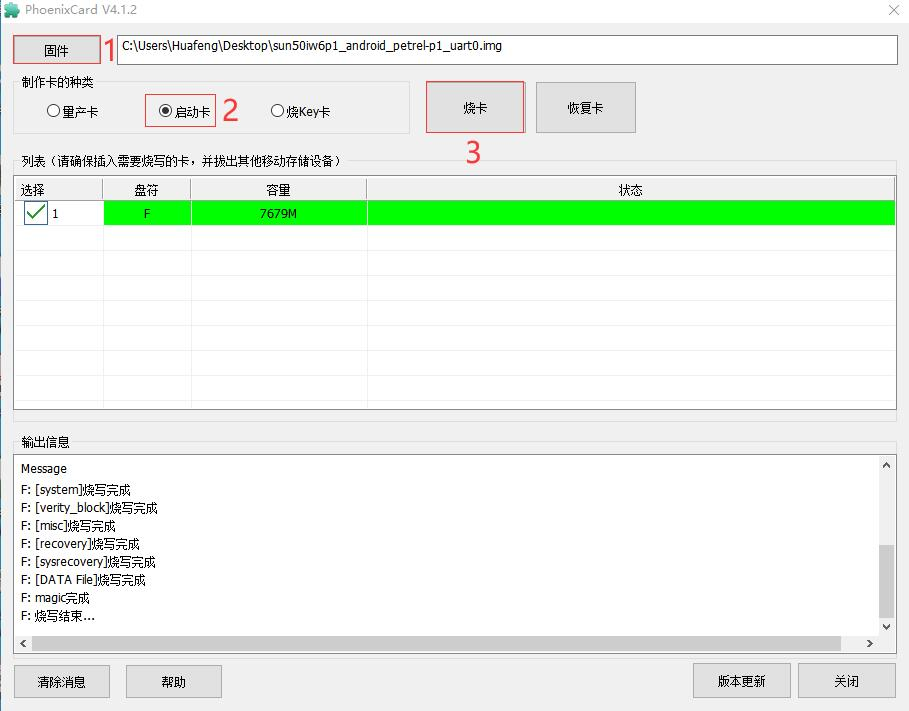
The development board can boot the system from SD. The following is how to burn the system to the SD card:
Insert the SD card into the computer, open the PhonixCard software, click "固件" to load the Image system file, select "启动卡", click "烧卡", after the programming is completed, insert the card into the SD card slot, and power on the development board again can.
2.Burn Android system to EMMC
